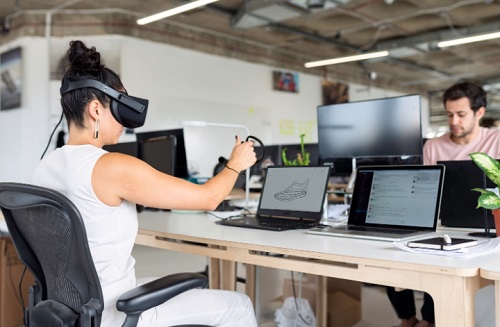
Virtual reality (VR) has transformed the way we experience digital content, offering immersive environments that transport us to different worlds. Connecting a VR headset to a PC is a crucial step in accessing these experiences. However, many users find the setup process daunting. This guide simplifies the steps, ensuring you can enjoy your VR adventures without frustration. We’ll cover compatibility, preparation, connection instructions for popular headsets, troubleshooting tips, and more.

Understanding VR Headset Compatibility with Your PC
Before diving into the connection process, it’s essential to understand whether your PC can support the VR headset you intend to use.
1.Hardware Requirements: VR headsets typically require robust hardware. Ensure your PC meets the following specifications:
○Graphics Card: At least an NVIDIA GTX 970 or AMD Radeon R9 290.
○Processor: A modern multi-core processor (Intel i5 or AMD Ryzen 5).
○RAM: A minimum of 8 GB.
○USB Ports: Multiple USB 3.0 ports for sensors and controllers.
2.Software Compatibility: Most VR headsets rely on specific software platforms. Commonly, these include:
○Oculus App for Oculus devices.
○SteamVR for various headset types.
○Windows Mixed Reality for compatible headsets.
○Operating System: Ensure you are running a compatible operating system, such as Windows 10 or higher, to avoid any hiccups during installation.
Preparing Your PC for VR Headset Connection
Preparation is key to a smooth VR experience. Follow these steps to get your PC ready:
1.Update Drivers: Ensure your graphics card and USB drivers are up to date. This can prevent performance issues and enhance compatibility with your headset.
2.Install Required Software:
○Download the necessary software for your VR headset. For Oculus, download the Oculus app; for other headsets, install SteamVR.
○Follow the installation prompts and create an account if needed.
3.Check USB Ports: Make sure you have enough USB ports available. VR headsets often require several ports for sensors, controllers, and the headset itself.
4.Cable Management: Organize your cables to avoid tangling and potential damage. This step will help maintain a tidy setup and improve your overall VR experience.
Once your PC is prepared, you’re ready to connect your VR headset.
Step-by-Step Instructions for Connecting Popular VR Headsets
Let’s look at how to connect some of the most popular VR headsets:
Connecting the Oculus Rift and Rift S
1.Connect the Headset:
○Plug the USB and HDMI/DisplayPort cables into your PC.
○Connect the sensors to the USB ports.
2.Launch the Oculus App:
○Follow the on-screen instructions to set up your room boundaries and sensor placements.
3.Complete the Setup:
○Once the app detects the headset, complete the setup by following any additional prompts.
Connecting the HTC Vive and Vive Pro
1.Connect the Headset:
○Plug in the HDMI/DisplayPort and USB cables into your PC.
○Connect the base stations to power and sync them with the headset.
2.Launch SteamVR:
○Open Steam and go to the Library section, then launch SteamVR.
3.Configure Room Scale:
○Follow the prompts to set up your play area and calibrate your headset.
Connecting the Valve Index
1.Connect the Headset:
○Connect the DisplayPort, USB, and power cables to the PC.
○Attach the base stations and ensure they’re powered on.
2.Open SteamVR:
○Launch SteamVR to begin the setup process.
3.Room Setup:
○Follow the instructions to configure your space.
Connecting the Oculus Quest 2 via Oculus Link
1.Prepare Your Quest 2:
○Enable Developer Mode in the Oculus app on your phone.
2.Connect Using a USB Cable:
○Use a compatible USB-C cable to connect your Quest 2 to your PC.
3.Launch the Oculus App:
○Accept the prompt in your headset to enable Oculus Link.
4.Select the VR Content:
○Browse and play VR games or apps through your PC.
Troubleshooting Common Connection Issues
Even after following the steps above, you may encounter some common issues. Here’s how to troubleshoot:
1.No Signal to Headset:
○Ensure all cables are securely connected. Check that the correct ports are used.
2.Software Not Recognizing Headset:
○Restart the Oculus app or SteamVR. If necessary, update the software.
3.Performance Issues:
○Lower the graphics settings in your VR games to improve performance.
○Ensure no other resource-intensive applications are running.
4.USB Connection Problems:
○Try different USB ports. Use USB 3.0 ports for optimal performance.
Conclusion
Connecting your VR headset to a PC can seem intimidating, but by following this comprehensive guide, you can easily set up your system for immersive experiences. Make sure to check compatibility, prepare your PC, and follow the steps for connecting your specific headset. Troubleshooting any issues will further enhance your VR experience, allowing you to explore new worlds seamlessly.
FAQs
What are the minimum system requirements for VR headsets?
Most VR headsets require a powerful system. Common minimum specs include a quad-core processor, 8GB RAM, and a dedicated graphics card like the NVIDIA GTX 970 or AMD Radeon R9 290. Always check the headset manufacturer’s website for specific requirements.
Can I use multiple VR headsets with the same PC?
Yes, you can use multiple VR headsets with the same PC, provided your system meets the hardware requirements for each headset. You may need to switch between setups depending on which headset you’re using at the time.
How do I optimize my PC settings for the best VR performance?
To optimize your PC for VR, update graphics drivers, close unnecessary background applications, and adjust in-game settings to lower resolutions or details. Consider using performance-enhancing software and ensure your cooling system is adequate to prevent overheating during extended sessions.
